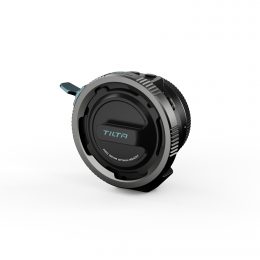
This guide provides a comprehensive overview of how to set up and use the Tilta Nucleus Auto Focus Adapter.
Hardware Setup
With Nucleus Nano II Motors
-
Mount Motors: Connect your motors to the lens using the provided 15mm rods.
-
Connect Data: Use the dual USB-C cable to connect the “Motor” port on the adapter to the bottom ports of both Nano II motors [00:39].
-
Power: Connect a power source to the USB-C port labeled “Power” on the right side of the adapter [00:51].
-
Calibrate: The motors will automatically calibrate. Once finished, ensure the focus motor LED is Purple and the iris motor LED is Green. You can change the color by single-pressing the button on the motor [01:05].
With Nucleus M Motors
-
Mount Motors: Attach the motors to your lens.
-
Power: Power the first motor via a P-TAP source (such as the V-Mount battery plate). Use a 7-pin to 7-pin extension cable to daisy-chain power to the second motor [01:52].
-
Connect to Adapter: Connect the USB-C port labeled “Motor” on the adapter to the open 7-pin port on the second motor using the 7-pin to USB-C cable [02:08].
-
Motor Assignment: Ensure the Focus motor is assigned to the correct number in the motor’s internal menu (LED should be Purple) and the Iris motor is Green [02:28].
Adapter Configuration
Motor Side Assignment
You must tell the adapter which side of the lens each motor is mounted on:
-
Double-tap the right-hand button on the adapter to select the Focus motor (F) [01:19].
-
Double-tap again to select the Iris motor (I).
-
While the letter is flashing, use the left-hand dial to toggle between “L” (Left) and “R” (Right) based on your physical setup [01:30].
Selecting Motor Model
-
Press the left-hand menu button.
-
Navigate down to “Motor Model.”
-
Select either “Nano 2” or “M2” depending on your hardware [01:40].
Lens Configuration
Quick Start Function
For a fast setup without full mapping:
-
Enter the menu and select “Quick Start.”
-
Set the Squeeze Factor (1.0 for spherical, or the specific factor for anamorphic lenses) [03:10].
-
Enter the Focal Length (e.g., 42mm).
-
Select the Widest Iris value (e.g., 2.2) [03:21].
Using the Lens Library
-
Navigate to “Lens List” in the menu.
-
Select the brand name and focal length for your supported lens.
-
Select “Use Data” to load the profile [04:19].
Adding and Mapping a New Lens
If your lens is not in the library, you can map it manually:
-
Go to “Add Lens” and enter the brand, series, and circle of confusion [04:46].
-
Map Focus: Move the lens physically to Infinity and press Enter. Then move to the minimum focus distance, adjust the value on the adapter, and press Enter. Adding more intermediate marks will increase accuracy [05:13].
-
Map Iris: Physically move the iris to the most open position, match the number on the adapter, and press Enter. Repeat for all marked iris values [05:53].
Operational Features
-
Lens Speed: Adjust the “Lens Speed” in the menu to change how fast the autofocus reacts, independent of camera settings [03:43].
-
Manual Override: When using the Nucleus M II FIZ Hand Unit, you can temporarily override autofocus by holding the function button. Autofocus resumes when the button is released [04:02].
Firmware Updates
-
Connect the adapter’s “PD IN” port to a computer via USB-C.
-
Enter the menu and select “Import Data.” The adapter will appear as a drive on your computer [06:24].
-
Drag the firmware update files (for the adapter or motors) into the drive.
-
On the adapter, navigate to the “Update” menu, select the file, and initiate the update [06:49].
-
For motor updates, connect the motor to the adapter via USB-C while holding the motor’s pairing/arrow buttons to enter update mode [07:47].

 (No Ratings Yet)
 Loading...